
Materials:
- Wick Roll
- Seeds (basil, marigold, endive)
- Coco coir (cubes)
- Dry Nutrient Packs
- 1/32 measuring teaspoon
- Mixing sticks
- Stapler
- Plastic bottle
- Scissors
Process:
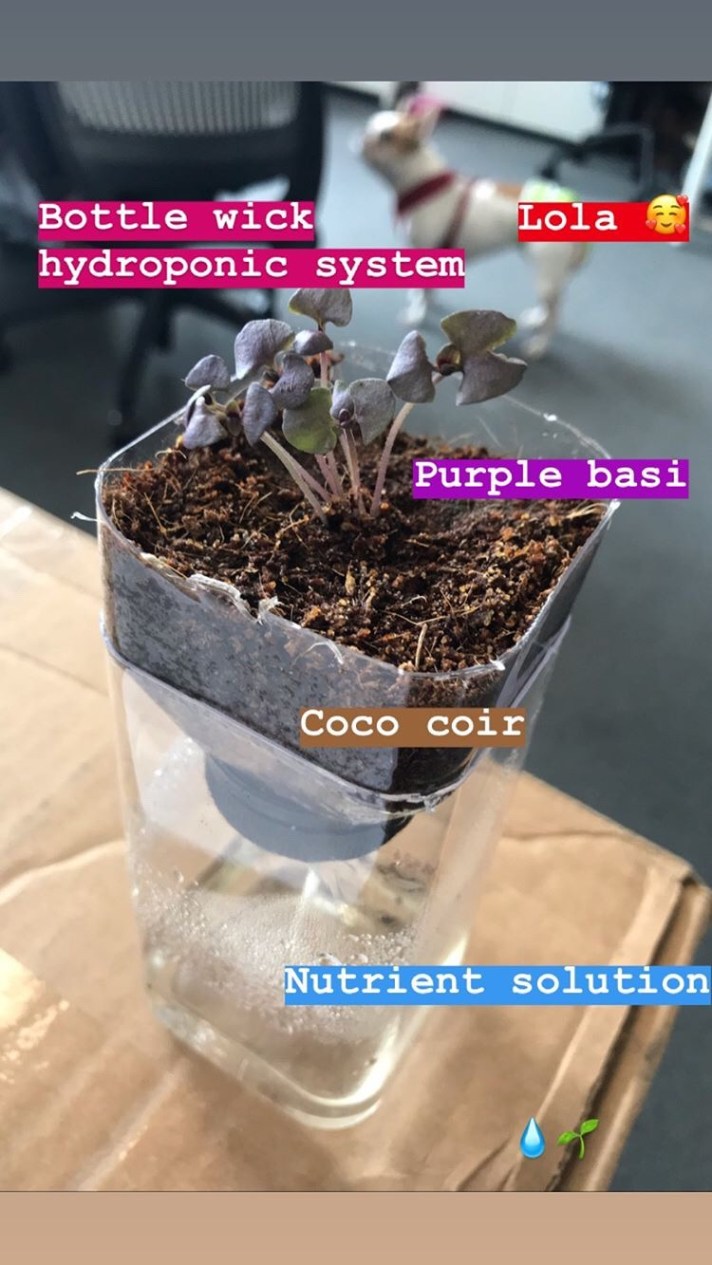
- Create a bottom and top chamber out of your bottle.
Cut the top of the bottle off about 3 inches below where the curve starts. - Make a hole in the cap. Use the tip of a pen or hole puncher (or drill if using a soda bottle or other thick plastic cap) to make a hole in the bottle cap. You can punch a hole in the plastic near the mouth of the bottle if this is easier.
- Thread a wick through the hole in the bottle cap and tie a knot. Be sure to hold the upper end of the wick upright and fill the coco coir around the wick to ensure moisture at top of the coco coir. Use a pen to assist in threading the wick through the bottle cap, cut the wick long enough on both sides of the cap to reach the bottom of the bottom chamber and near the top of the coco coir in the top chamber.
- Attach the bottom and top chambers. Turn the top chamber upside down to allow the wick to sit in the bottom chamber and staple the top part to the bottom part in one spot. Be sure not to staple all sides to allow you to add nutrient solution when necessary.
- Fill the bottom chamber with nutrient solution.
- *To mix nutrient solution:
- Using a 1/32 Teaspoon, add dry nutrients:
- For Basil & Lettuce: Add 2-3 scoops of dry nutrients (Ideal EC = 700 to 1200)
- For edible flowers, mint, endive, and mustard greens: add 3-4 scoops of dry nutrients (Ideal EC = 1400-1700)
- Ideal pH of all nutrient solution = 5.5 to 6.5
- You can test the nutrient level by using a digital meter.
- When your water level drops significantly, add tap water to keep the wick underwater in the bottom chamber. You do not need to any more nutrients for the life of this plant, just fresh tap water to maintain the water level (keeping the wick submerged).
- Using a 1/32 Teaspoon, add dry nutrients:
- *To mix nutrient solution:
- Fill the top chamber with coco coir and plant your seeds.
Coco coir is made from the outside of a coconut husk and provides the seed with a moist home and later provides support for the plant’s roots. Flatten the coco coir by gently patting it down on the surface. If you use the plug version of coco coir (see link below), tear the plug on one side and sandwich the top end of the wick between the coir to ensure moisture is drawn up to your plant. - Cover with plastic wrap and a rubber band and place near the light source until sprouting.
This will increase the humidity in the top chamber and increase the rate of seed germination (sprouting). - Remove the plastic when you see any sign of a sprout.
Once you see any green sprouting out of the coco coir (or purple if you planted purple basil), be sure to remove the plastic to allow the plant to grow tall and reach its full potential.
 Hydroponic Wick Bottle Systems made by middle schoolers in Brownsville, Brooklyn with Teens for Food Justice. @Hydroponics.NYC
*Be sure to add nutrient solution initially to the bottom chamber and refill with tap water as needed, since it will evaporate out and get used up by your plant.
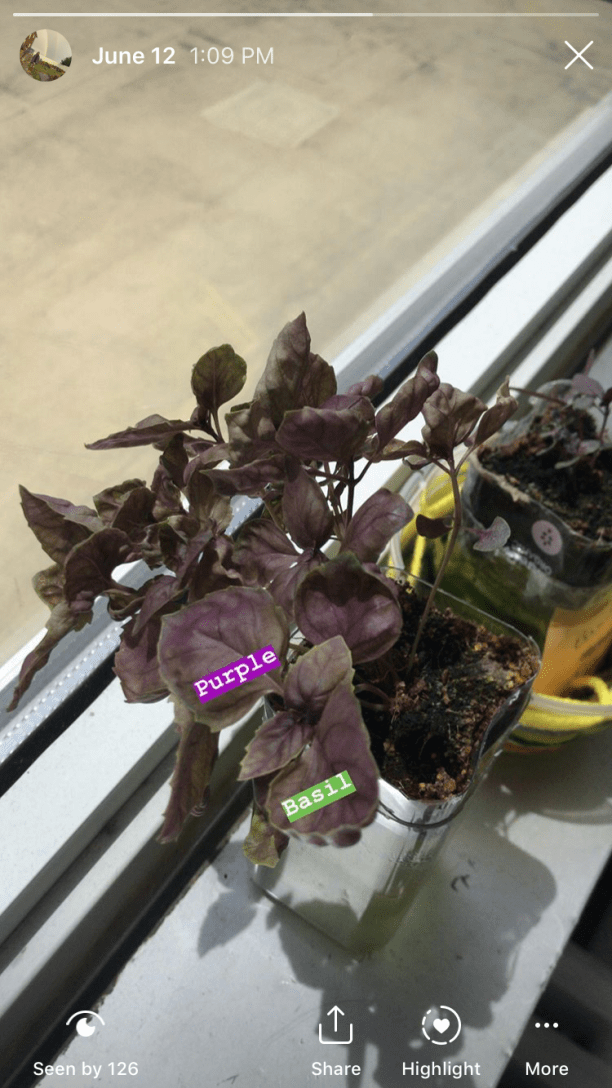 Purple Basil.
IG accounts:
@Hydroponics.NYC
@Matthew_Gerard_
